Minecraft OpenGL is a setting within your game that aims to make the game faster and smoother, by reducing the system’s rendering load by “instructing” the GPU to not render anything that is not in the player’s direct view. Obviously, a balance occurs, with the GPU running less but the CPU loads more.
The default option is set to ‘On’ so users can boost performance, so it’s very common to see circumstances in which users experience the “OpenGL Error 1281” error message. This error message is primarily related to simultaneously running external variables and modules.
What causes ‘OpenGL Error 1281’ in Minecraft?
If you experience this error message when playing a fully modded Minecraft, it is possible that any of the modules clashes with your playing. After our initial survey, we concluded that some of the reasons for the error are:
Shaders: Shaders are graphics that the user in their modded Minecraft normally imports. If either of them is inaccurate or corrupt, the game shows the error.
Version control: Minecraft is known to show issues if your forge and shader versions do not sync with each other.
OptiFine: OptiFine is one of those third-party apps that aim to boost Minecraft gameplay by allowing players more game control. If this isn’t updated or is in an error state, you will experience the OpenGL error.
Java Files: Minecraft uses Java as part of its game application. Typically, the game downloads all of the Java requirements automatically, but if they are left out this error will show up.
Make sure you are logging in to your computer as an administrator and have an active open internet connection before we go on with the solutions.
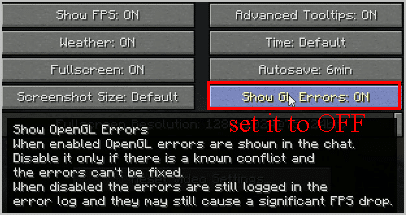
Disable Show GL Errors
There is basically an option in your Minecraft game to disable OpenGL errors.
To do so, follow these steps:
- In Minecraft, click Options.
- Click Video Settings > Others….
- Click Show GL Errors and turn it OFF.
- Save the setting and restart Minecraft.
Try playing Minecraft and see if it works properly
Update your graphics card driver
Missing or obsolete card driver in Minecraft can lead to an OpenGL Error 1281. In order to rule it out you can switch to the latest version of your card driver.
There are two ways to update your audio driver: manually and automatically.
Manual driver update – You can visit your video card manufacturer’s website, find your device’s latest correct driver, download and update it on your computer. Time and computer skills are required for this.
Automatic driver update – If you don’t have time or patience, you can do it automatically with Driver Easy.
Updating OptiFine
OptiFine is a Minecraft optimization application that helps the game to look better and run faster. It also offers full support for HD textures and other modding setup options. It enables users to gain an FPS rise, requires shader support, etc.

In short, the main driving force behind the mods can be said to communicate with each other. We have seen several cases where the older use of OptiFine typically triggers the error message
Check your Minecraft for the version of OptiFine. If it is older, try visiting the official OptiFine download page and downloading the latest version as soon as possible. Restart your computer before you launch the game.
Temporarily disable mods
It is normal for people to mod Minecraft to enjoy better gameplay. However, some mods may cause Minecraft conflicts. You would have to uninstall Minecraft’s mods to fix OpenGL Error 1281 in certain circumstances.
If OpenGL error 1281 ceases occurring, the culprit – mods need to be found. To fix the issue, you can deactivate your mods one by one. If OpenGL errors still persist, mods aren’t your problem and ensure to re-enable mods later on.
Remove All Shaders
Shaders are Minecraft add-ons that enable players to change the appearance of various terrains and settings. They’re very much like mini-mods that change the look of the game, like switching from summer to winter. Shaders have been known to clash with other mod components because they consume all of the app’s resources.
It would be best if you disabled the preexisting shaders one by one to determine which of them resolves the error notice. Start at the top of the roster, beginning by selecting the most recent addition to the game. You can duplicate and paste the shaders to another directory if you want to use them later.
Installing Java Packages Manually
Java file packets are a collection of Java file directories that are used in various applications including Minecraft operations. Indeed, all the mods used in Minecraft have Java and if the Java file package itself is not mounted on your computer, you will not get the error message. We’ll manually install Java files on your computer here in this solution, and check if the issue is resolved.
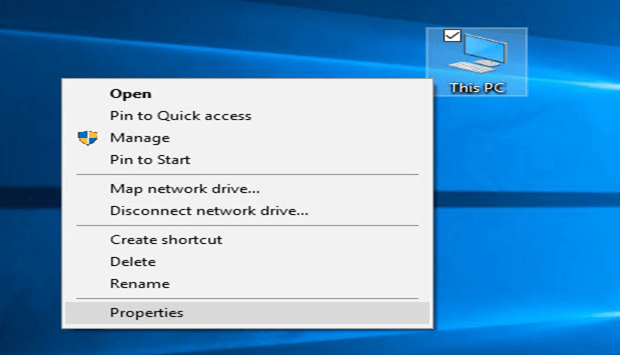
- Right-click on This-PC present on your Desktop and select Properties.
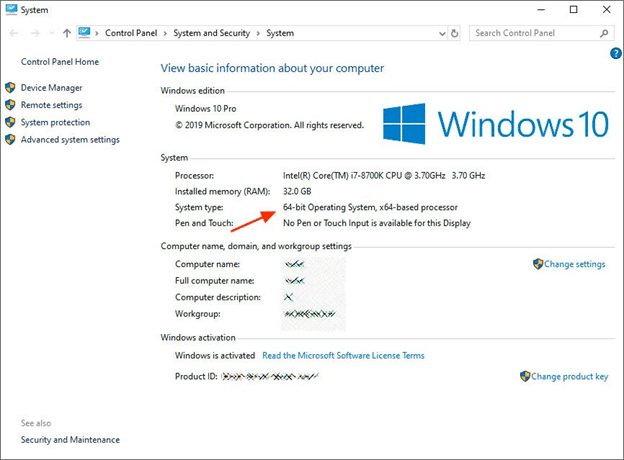
- Now in front of System type check the type of operating system installed on your computer. If it is 32-bit, download the Java files from (here) and if it is 64-bit, download them from (here).
- Now extract the file which you just download to an accessible location. Open the folder and copy the file version folder that you see.
- Now press Windows + E to launch Windows Explorer and navigate to the following path:
C:\Program Files\Java (for 32 bit)
C:\Program Files (x86)\Java (for 64 bit)
- Now paste the file which you copied to the location. Make sure that you copy the name of the folder which we just pasted.
- Launch the Minecraft mod manager and click on Edit profile present at the bottom of the screen.
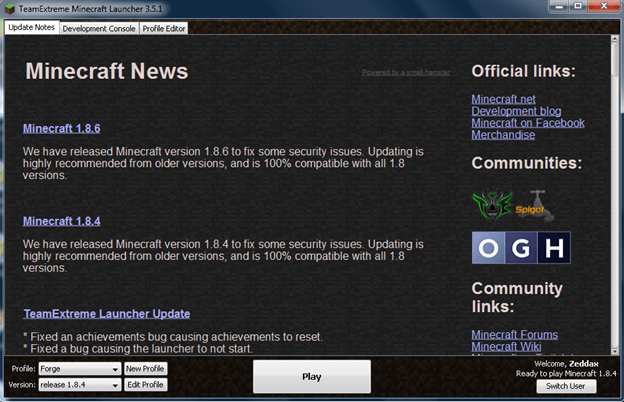
- Now underneath Java settings (Advanced), check the executable option and replace the correct path. In the picture above, the path of the file we just pasted is set correctly.
- Restart your computer and launch Minecraft again. Check if the issue is resolved.
Download The Opengl32.Dll
We consulted with someone who specializes in Minecraft code, and they suggested downloading the opengl32.dll and adding it to the Minecraft app data. This method has been successful for many Minecraft players as it was an easy and quick fix to any OpenGL bugs, so we recommend that you also give it a shot.
It is essential to remember that there are a few steps involved in making this solution work. After you have successfully downloaded the DLL file, follow the guide provided below:
- Launch your web browser and download open32.dll. Depending on the OS version of your computer, select between the 32-bit or 64-bit files. You can easily find open32.dll and several other DLL files for free download.
- After downloading, right-click the Minecraft Launcher. Now find and left-click open the Open File Location option.
- From this directory, open the runtime folder, next find the JRE-x64 folder and open the bin directory.
- Now copy-paste the downloaded opengl32.dll in the bin directory.
- Lastly, restart your PC and launch Minecraft to ensure whether or not the issue persists.
Reinstalling Minecraft
You should try to reinstall the whole game if any of the above strategies do not work. Please note that your user data may be deleted if it is not saved or backed up to your profile. The user data folder can also be copied from the game directory from another location.
Step # 1: Press Windows + R, type “appwiz.cpl” in the dialogue box and press Enter.
Step # 2: Once in the application manager, locate Minecraft, right-click on it and select Uninstall.
You can also uninstall the game from the folder directory by running the uninstaller. Make sure all mod files and temporary setup files are also deleted.
Step # 3: Now navigate to Minecraft’s official website, insert the credentials and download the game again.
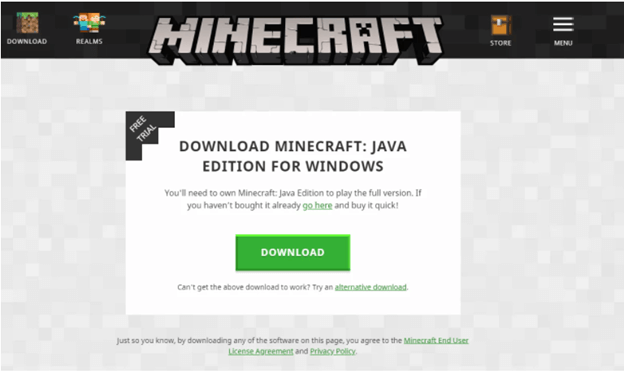
Make sure that you have your credentials available as they will be needed for the download of the game from the site.
The guide ends here. Do share your feedback in the comment section below.
Read Also
- How To Delete a Roblox Account
- How To Fix PayDay 2 Mods not Workings
- Paladins – Which Champions Are the Best To Use?
- Epic Seven Tier List
- 7 Best Fallout Games
- 7 Best Sims 3 Mods
- How To Fix “Steam Content File is Locked” Error
- How To Fix Geforce Experience Error Code 0x0003
- How To Fix Twitch 2000 Network Error
- How to Fix Geforce Experience Not Opening
- How to Fix Origin Error 327683:0
- 5 Best Android Games to Play on PC
- How to Get Free V-Bucks In Fortnite
- The Alchemist Code Tier List
- How To Unlock Every Character In Risk Of Rain 2
- How To Get An S Rank In League of Legends
- How to Fix ‘A Ubisoft Service Is Currently Unavailable’ Error?
Raheel Umair
Raheel is a passionate tech blogger writing in the tech industry for the last 8 years; He is working as a senior technical writer at Reviewsed.