Beacons are an essential endgame item in Minecraft. They are visible landmarks from great distances and significantly impact the local status quo. This makes beacons one of the most sought-after unique blocks despite the lengthy grind required to get one. Beacons in Minecraft are intended to be constructed late in the game, and they serve as a bragging point and a practical tool for skilled Minecraft players.
Below you’ll find our comprehensive Beacon Guide, with instructions on creating a beacon, how to activate it, and what it can help you achieve in the game! Dive in and find out so you can get the best Minecraft gaming experience!
What exactly is a Beacon, and what use does it serve Minecraft?
Making a beacon is similar to constructing a Nether Portal in that it requires precise placement. When it’s finished, a beam of light will shoot into the sky, and you’ll be able to boost yourself and any nearby players.
The Best Way to Create a Beacon

Beacons in Minecraft are often intended to be constructed at the end of the game. Like every other item in Minecraft, a beacon requires additional building supplies, and everything you need to make a Beacon is detailed here.
- Nether Star: 1
- Glass: 5
- Obsidian: 3
The Minecraft Beacon Range: What Is It?
Remember that the beacon’s boosts or buffing effects only apply to targets inside its impact area. According to the Minecraft wiki page on beacons, these unique blocks “impact a region in the form of a square column, which stretches downward and out to each side at a range specified by the size of the pyramid base, and upward a distance of that range + 384 blocks.”
The size of the pyramid foundation upon which the beacon is set will determine the scope of the status effects it will deliver. For the initial layer of blocks, the 3×3 grid, the beacon will provide a minimum range of 20 blocks in each direction, and ten blocks may extend the beacon’s range for every additional level or layer.
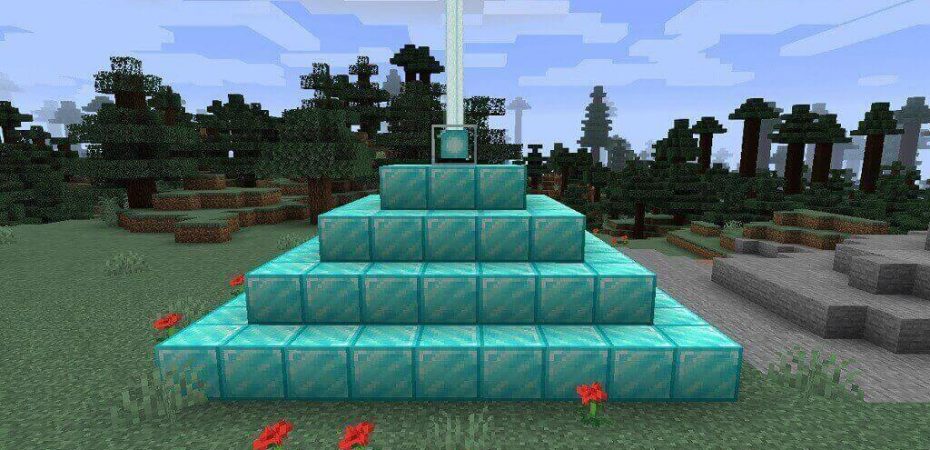
Ultimately, the beacon can only be seen from a maximum of 50 blocks away in any direction (other than up). The recommended block patterns for the four levels are as follows: 9×9, 7×7, 5×5, and 3×3 from the bottom layer to the top layer, respectively.
The beacon’s range may increase if the pyramid is filled with no gaps in the center. If you just line one side of the pyramid with the blocks, the beacon won’t operate. Also, the beacon’s capacity to transmit status effects depends on its foundation, which should be constructed from the proper materials.
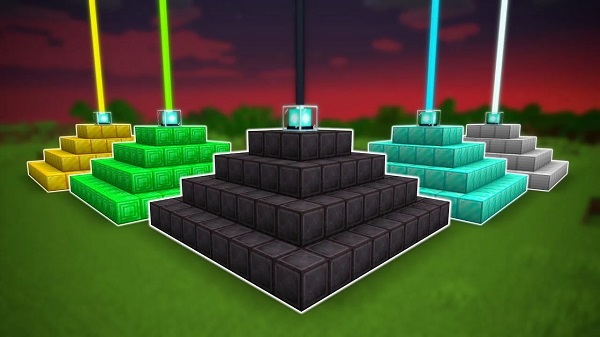
The beacon’s pyramid foundation may be constructed using the following components.
- Gold Blocks
- Iron Blocks
- Nephrite Blocks
- Emerald Blocks
- Diamond Blocks
After constructing the pyramid with the correct amount and variety of blocks, you may set the beacon on its center peak and feed it with the necessary ingot to begin emitting status effects that boost its surroundings.
However, you’ll find that the status effects only continue for 17 seconds after you leave this area of impact. Returning to the beacon’s range rapidly resets the countdown timer for the status effects.
It’s also worth noting that the status impact is unaffected by the player’s distance from the beacon block. This means that even if you are on the furthest block that the beacon can reach, you will still experience the same status consequences.
The Basics of Turning on a Beacon

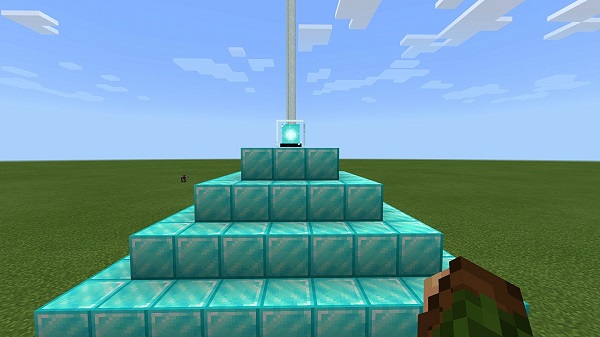
After constructing a beacon, the next step is to turn it on. You need to build a pyramid to activate the beacon, and the greater the pyramid’s height, the greater the range of effects it will have. Only blocks of Iron, Gold, Emeralds, Diamonds or Netherite may be used to construct a pyramid, and the Pyramid may be built from any combination of these pieces.
Keep in mind that the beacon has to be able to point directly toward the sky to function, so constructing it inside is not an option. You’ll find a complete breakdown of a Pyramid’s dimensions and the associated abilities at various heights below.
Level 1
A 9×9 radius is required for a level 1 pyramid. If you’re done, place the beacon in the middle of the 9×9 and watch as a beam of light soars upwards. The next step is to choose a power, and here are all the powers you may select.
- Haste 1
- Speed 1
You’ll need to give up an Iron Ingot, Gold Ingot, Netherite Ingot, Diamond, or Emerald if you want to use the powers. Simply put, if you go beyond the 20-block radius of a Level 1 Pyramid, it will disappear after 11 seconds.
Level 2
A level two pyramid has a base with a 9×9 radius and an additional level with a 7×7 radius. Once the second level is complete, the beacon may be positioned in the center to shoot a light soaring into the night sky. The next step is to get to the beacon and choose a strength. The many powers available to you are detailed below.
- Jump Boost 1
- Speed 1
- Resistance 1
- Haste 1
You’ll need to give up an Iron Ingot, Gold Ingot, Netherite Ingot, Diamond, or Emerald if you want to use the powers. There will be a 13-second cooldown if you go outside the 30-block radius of a level-2 Pyramid.
Level 3
A level three pyramid has a base with a 9×9 radius, a second level with a 7×7 radius, and a third level with a 5×5 radius. Placing the beacon at the center of the third level causes it to shine upwards. The next step is to get to the beacon and choose a strength. All of the available powers are detailed here.
- Resistance 1
- Jump Boost 1
- Strength 1
- Speed 1
- Haste 1
You’ll need to give up an Iron Ingot, Gold Ingot, Netherite Ingot, Diamond, or Emerald if you want to use the powers. When activated, a level 3 Pyramid’s radius is 40 blocks, and it remains active for 15 seconds even if you leave its zone.
Level 4
A level three pyramid requires a foundation with a 9×9 radius, a second level with a 7×7 radius, a third level with a 5×5 radius, and a final level with a 3×3 radius. When you reach the third level, center the beacon there, and turn it on; a beam of light will shoot upwards. The next step is to get to the beacon and choose a strength. The many powers available to you are detailed below.
- Jump Boost 1
- Strength 1
- Speed 1
- Haste 1
- Resistance 1
You’ll also get secondary Regeneration 1 power. You’ll need to give up an Iron Ingot, Gold Ingot, Netherite Ingot, Diamond, or Emerald if you want to use the powers. When activated, a level 4 Pyramid’s radius will expand to 50 blocks and remain active for 17 seconds even if you go outside its zone.
Additionally, if you have a beacon and a Pyramid at level 4, you may stack them. You’ll have completed the structure if you add nine more blocks to the bottom, seven to the middle, and five to the top.
Conclusion
There you have it! After killing the Wither and earning a Nether Star, you will be deep into the game, and the beacon will be a crucial tool for helping you destroy enemies who benefit from the Haste status effect. With any luck, you’ll use this guide as a road map to find the optimal spot for your Minecraft world’s first (or following) beacons. Have fun and good luck!
Read also:

