In the ever-evolving landscape of digital entertainment, Kodi builds have become the go-to solution for a streamlined and personalized media experience. Diggz Xenon Kodi Build, in particular, stands out for its user-friendly interface and extensive features. In this comprehensive guide, we’ll walk you through the step-by-step process of installing Diggz Xenon Kodi Build on any device, complete with illustrative pictures to ensure a hassle-free setup.
Understanding Diggz Xenon Kodi Build
What Sets Diggz Xenon Apart?
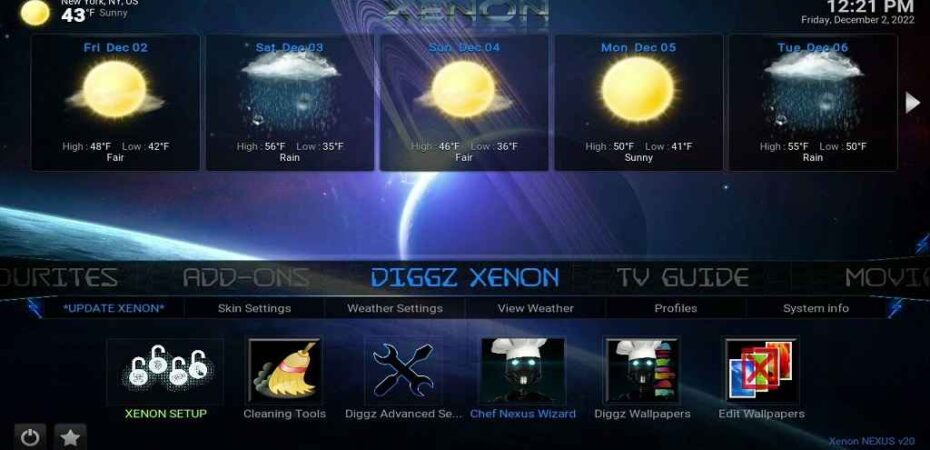
Diggz Xenon Kodi Build offers a plethora of features, including a diverse range of pre-installed addons, a visually appealing interface, and seamless navigation. Its lightweight design ensures optimal performance on various devices, making it an ideal choice for both beginners and seasoned Kodi enthusiasts.
Compatibility Across Devices
One of the standout features of Diggz Xenon is its compatibility with a wide array of devices. Whether you’re using a Firestick, Android TV, PC, or Mac, the installation process remains consistent, providing users with a unified experience across platforms.
How to Install Diggz Xenon Kodi Build
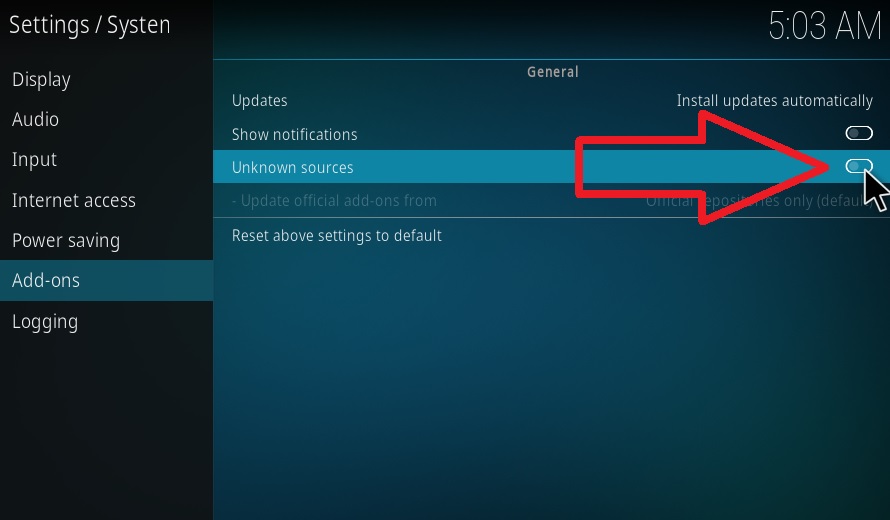
Step 1: Enable Unknown Sources
To kick off the installation process, you’ll need to enable Unknown Sources on your device. Navigate to the settings menu and select “Security” or “Privacy,” depending on your device. Toggle the switch for Unknown Sources to grant permission for third-party installations.
Step 2: Download Kodi
If you haven’t already installed Kodi on your device, head over to the official Kodi website and download the version compatible with your operating system. Follow the on-screen instructions for a seamless installation.

Step 3: Launch Kodi and Access Settings
Once Kodi is successfully installed, launch the application. Navigate to the settings menu by clicking on the gear icon located in the top-left corner of the screen.
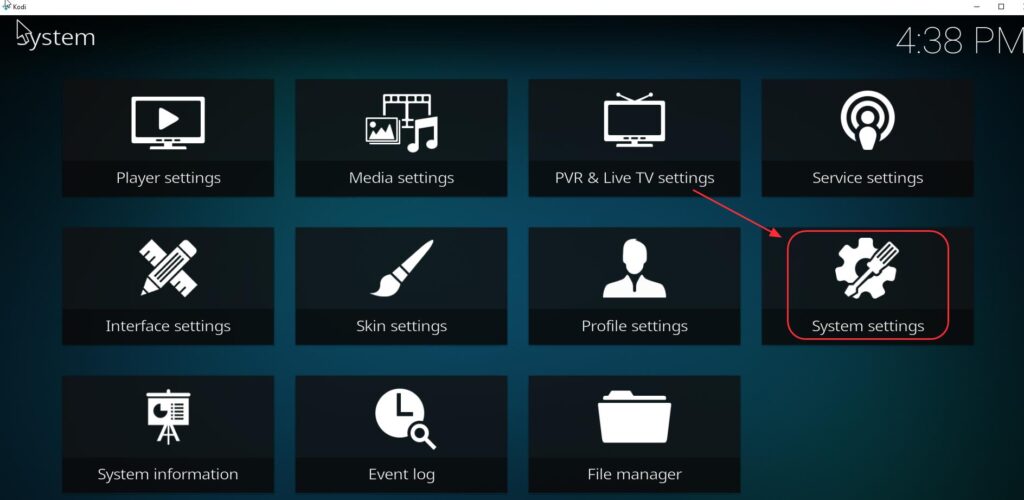
Step 4: File Manager Configuration
In the settings menu, locate and click on “File Manager.” Here, you’ll add a source URL to facilitate the installation of Diggz Xenon Kodi Build.
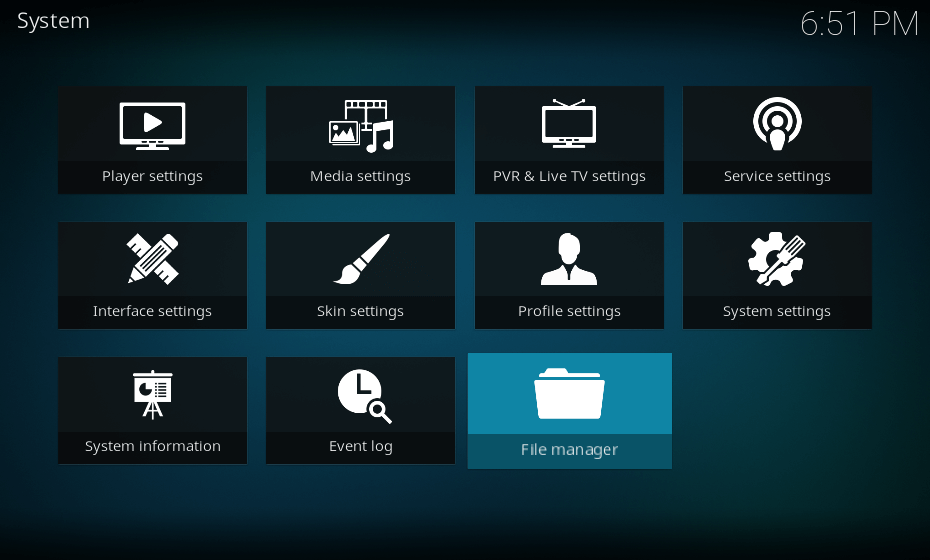
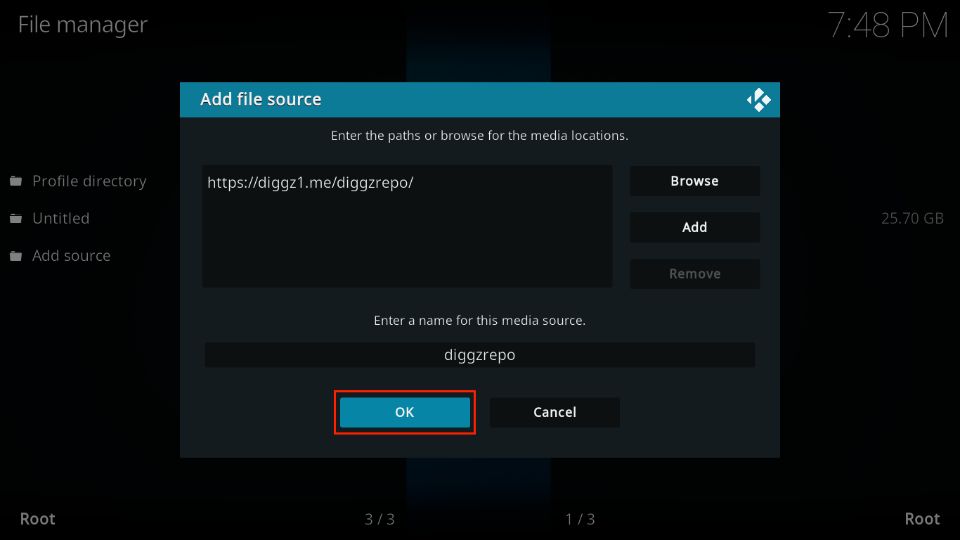
Step 5: Add Source URL
Within the File Manager, click on “Add Source.” A dialogue box will appear; enter the source URL for Diggz Xenon. Ensure accuracy to avoid installation errors.
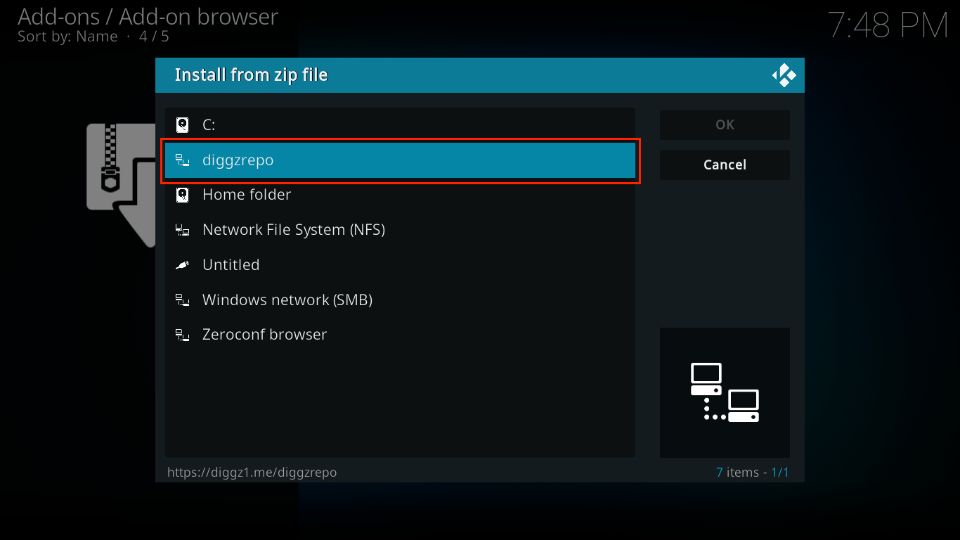
Step 6: Install Diggz Xenon Repository
Return to the main menu and select “Add-ons.” Click on the package icon and choose “Install from zip file.” Locate the source you added in the previous step and select the repository zip file for Diggz Xenon.
Step 7: Install Diggz Xenon Build
After successfully installing the repository, choose “Install from repository.” Find Diggz Xenon Repository and select “Program add-ons.” Install the Diggz Xenon Wizard and follow the prompts to install the build.
Conclusion
In conclusion, installing Diggz Xenon Kodi Build on any device is a straightforward process that enhances your media consumption experience. With its user-friendly interface and extensive features, Diggz Xenon stands out as a top choice for Kodi enthusiasts. Follow the step-by-step guide above, accompanied by illustrative pictures, to enjoy a seamless installation and unlock the full potential of your digital entertainment setup. Elevate your Kodi experience with Diggz Xenon today!
Read Also
- How to Install Popcorn Time on Kodi
- How To Install Kodi on Roku?
- How To Install Google Drive on Kodi
- 7 Genesis Reborn Kodi Addon Alternatives
- Install USTVNow on Kodi
Markhascole
Mark is a cyber security enthusiast. He loves to spread knowledge about cybersecurity with his peers. He also loves to travel and writing his travel diaries.