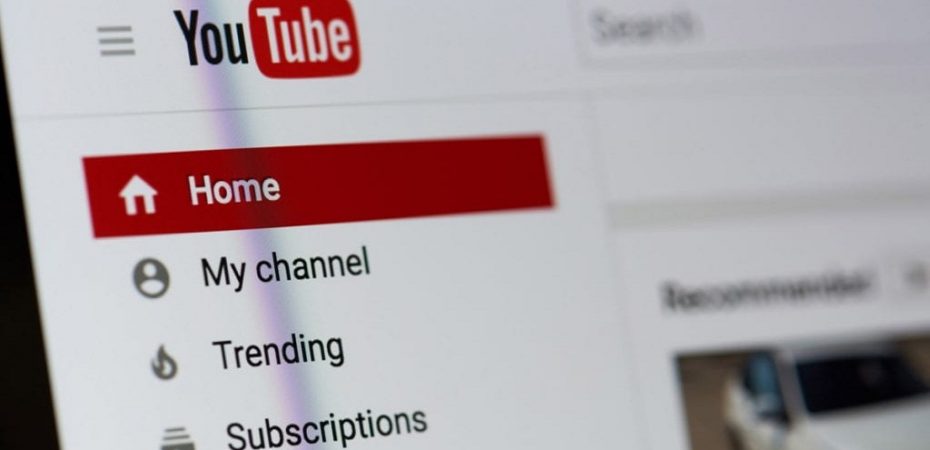
YouTube is the biggest platform for videos on the internet, and you can share all your videos on it easily and freely. You don’t have to make a separate account for YouTube if you have a Google account. You can use the Google account for YouTube too. These days the use of a phone as a camera is quite common. You can load your video using your smartphone, or you can use your laptop to upload your phone video to YouTube, where everyone can watch them.
Install the YouTube app on your iPhone or Android phone if you haven’t already done so. You can also use your laptop to upload your video to YouTube using any browser. Before uploading the video, you can edit it using a good video editor.
There are things you should consider which will help you to ensure that your video is of good quality and is easily accessible so that it gets maximum views. If you want to start your channel, you can use your phone as a camera. Here are some tips on how you can upload videos to YouTube in a few easy steps.
Search Engine Optimization (SEO) Issues
You should carefully consider the video’s title, description, and other technical aspects. These are necessary to ensure that your video comes on top of the search when people are looking for a video that is in its category.
Length of the Video
The maximum length of your YouTube video is 15 minutes. If you want to post longer videos, click on ‘Increase your Limit’ on the upload page. If you have a verified account, then you can upload longer videos.
Size of the File
The size of the video file size can be a maximum of 2 GB. Larger files are allowed on request from verified accounts. The maximum limit of file size is 128 GB.
Picture Quality
There are also advanced specifications such as video resolution and bit rate, which affect the quality of the video and make the viewing experience better. A video with a high bit rate is smooth and pleasing to watch. A popular video format will ensure easy conversion to a YouTube video. Otherwise, you may need a video converter app such as Video Trimmer, Clideo or Movavi Video Converter. Take some guidance on how to make a good YouTube video from this blog.
- Resolution: You should record your video in high resolution in 1080p. This means it has a grid of pixels that is 1920 x 1080. This will look great on any type of device.
- Bitrate: This number tells you how much video information is stored per frame. Pay attention to the correlation between the resolution and bitrate. If your bitrate is too low, don’t expect to see a good quality video. The frame rate should not be less than 30 frames per second.
- Aspect Ratio: It is the width and height parameters of your video. YouTube’s default video aspect ratio is 16:9. If your video does not fit it, then it will have black bars on the sides when it is played.
Nine Publishing Strategies That Will Help You Expand The Channel For Your Brand On YouTube
Now that you are familiar with the fundamentals of uploading material to your brand’s YT channel, you are prepared to take things to the next level in order to broaden your audience. The following advice will provide you with a few unique strategies to build the organic subscriber base of your YouTube channel.
- Create engaging and high-quality content.
It seems like the obvious choice here. However, just as with any other piece of content that your company creates, the fact that the videos are of good quality and accurately portray your company is the single most significant aspect of their production. Although generating ideas for the movies you upload to YouTube can be difficult, this does not mean you need a considerable production budget or to employ Steven Spielberg as the director. You need to have a clear purpose and plan in mind for everything that you post online, as well as how your audience will react to what you share. Simply blogging for the sake of posting will not likely result in a significant amount of engagement among your audience.
- Get to know your target demographic.
Listening to what members of your audience have to say can be an effective strategy for developing content that will resonate with that group. It is more likely for a brand to produce video content that is better for engaging followers if the brand participates in social listening, uses market research, and creates personas to put its audience’s requirements front and center. You may examine the demographics of your audience and their preferences across all of your social platforms, including YouTube, with the assistance of several social listening strategies.
- Make branded thumbnails that are appealing.
To grab people’s attention on a deeper level, you can make use of eye-catching thumbnails that feature your brand. It’s easy to give in to the temptation of using the auto-generated choice, but doing so would mean missing out on a chance to attract more people to your channel. Be unique, but don’t stray too far from the brand. It would be best if you took full advantage of video thumbnails, which provide a sneak peek for your audience before they watch the whole video.
- Make use of the subtitles feature.
Increasing the accessibility of your videos by using closed captioning or subtitles makes it possible for you to reach a wider audience. There are 35 million people in the United States who have trouble hearing, but you should also bear in mind that not all of your audience will be native English speakers. This is something that you should take in mind when communicating with your audience. On top of that, people frequently view movies on their phones in settings where they are not allowed to turn on the sound since it is considered rude. In fact, 69% of mobile video viewers do not have the sound on. Therefore, investing the few extra minutes required to add subtitles to the videos you produce might be worthwhile.
- Experiment with a variety of available features.
It’s been said that variety is the spice of life. At least, this is how the proverb is supposed to be interpreted. This is absolutely true, and nowhere more so than on your various social media pages. The key to success is consistency, yet there is a distinction to be made between regularity and monotony. Experimenting with multiple aspects of your product is one strategy you can use to shake up your routine without deviating too far from your core identity. YouTube provides a wide variety of tools, such as YouTube Shorts and live streams, that may be utilized to post content and interact with an audience. Experimenting until you find the combination that works best for your audience is the greatest approach to figuring out what will resonate most strongly with them.
- Don’t overlook the importance of SEO.
Blogging is one of the first things that typically comes to mind when discussing search engine optimization (SEO). However, search engine optimization is also a significant component of your success on YouTube. How often have you performed a search on Google and been presented with a number of YouTube videos as results, with those films frequently appearing towards the top of the list? A growing number of search engines are beginning to include video results; astonishingly, YouTube videos constitute an astounding 70 percent of the first 100 search results on Google. Make sure you have a well-defined keyword strategy and constantly employ metadata (such as titles, descriptions, tags, and so on) to make your videos as searchable as possible on the platform. This will help you optimize the video for search results.
- Form relationships with online influence.
In the economy of creators, businesses that form partnerships with influential people can increase their exposure to new audiences while simultaneously acquiring high-profile pieces of user-generated content. Because the algorithm that powers YouTube personalizes suggestions based on users’ tastes and prior behavior, it is simpler to reach new individuals by tapping into another brand’s audience than relying only on the following that your brand has built up. More than fifty million people nowadays consider themselves creators, which means that businesses have a big pool of potential candidates to pick from as they look for the ideal collaboration.
- Advertise your material on social media platforms.
For organizations that are focused on expansion, simply uploading video material to YouTube and stopping there is not enough. Promotion in multiple directions should be prioritized. Make sure to notify your followers on other platforms (such as Twitter, LinkedIn, Instagram, Facebook, and even TikTok) whenever you upload a new video to YouTube by notifying them on those other networks. This will allow them to visit your channel and watch the video.
- Observe current trends with keen interest.
After you have established your presence on the platform, it is important to ensure that you keep abreast of current events and trends so that you may continue to expand your channel.
Here are the steps to Upload Videos to YouTube
Step 1 Activate the phone’s Wi-Fi.
Turn on your Wi-Fi connection so that you are connected to the internet.
Step 2: Log in to your YouTube account
Use the sign-in button located in the top right corner of the YouTube homepage to log in. You don’t have to create a specific account, since Google has acquired YouTube and you can use your existing Gmail account.
Step 3: Upload the Video
Once you are logged in and on the YouTube screen, look for the “+” sign in the top right corner. In some versions when you press your account name icon to enter your edit channel screen, and you will find the “+” sign at the bottom of the screen.
Click the “+” SIGN. YouTube will open a “Create” menu. Select “Upload a Video” from this menu. Now the app will show you thumbnails of all the videos that you have in your video gallery. Select the video that you want to upload on YouTube. When the video begins to play, tap “Next” in the top-right corner of the app.
The progress bar will show you how long it will take to upload your video – it will depend on the size of the video. During the time the video is being uploaded, you can add details about your video.
Step 4: Enter Details
As your video is being uploaded, you will get the “Add Details” screen.
Title: Add a suitable title to your video. It tells the viewers what the video is all about. This title is also used by search engines to ensure that your video comes up in search results. Keep your title optimally under 70 characters. Make the title attractive so that people are tempted to watch your video.
Description: Add a short description of your video. The description should have the relevant keywords for two reasons:
- YouTube’s algorithms will identify your video as relevant and pump it up in the search results
- It will be easier for YouTube audience to find your video
YouTube is the second-biggest search engine on the Internet after Google, so give some thought to selecting your keywords.
Step 5: Choose a thumbnail for your video
You can choose from one of the three automatically suggested options – the video’s screenshots that YouTube finds fitting.
However, if you upload a custom thumbnail, you may generate much more engagement, as thumbnails play a huge role in making your video stand out. Select a picture that shows what’s in your video. A good thumbnail draws viewers’ attention.
Step 6: Add to Playlists
If you have playlists on your channel, then select the playlist you want this video to be added to. Consider making a playlist and adding your video to it. Playlists can be quite useful for viewers who want to see a series of videos related to each other.
Step 7: Select Audience
Is your video suitable for children to watch? You are required to comply with the relevant laws related to the protection of children from undesirable content. You have to declare the content of the video regarding its suitability for children. Likewise, you can select age restrictions for those who can or cannot watch the video.
Step 8: Copyright Check
YouTube will check your video for copyright infringement that may restrict you from using it. If a copyright claim is found, permission will be sought from the copyright owner to allow you to use the content, and only then will YouTube allow ads on your video.
Step 9: Visibility
You can choose who can watch your video. You can select one of the visibility options for your video. Those who wish to keep their video personal can choose the “Private” option from the menu. You can still share a private video with a limited number of groups, friends, or co-workers.
Following options are available:
Public: This option allows everyone to watch your video.
Private: You can select the people you choose who can watch the video.
Unlisted: With this option, only the people with whom you share the video link can watch the video.
Step 10: Schedule:
If you’d like to release your video on YouTube at a specific time, then use the “Set Visibility” option and tap the “Schedule” option. Click the date and time drop-down box and choose a date and time for your video’s release.
Step 11: Publish
Click the “Save” button to complete the uploading process. Now your video is loaded on YouTube that can be watched by viewers around the world. You can share your video by sending the YouTube link to the relevant internet pages.
How Critical Are the YT Privacy Settings?
On your channel, you should assign different levels of privacy to the various categories of videos you upload to YouTube.
Before posting videos you do not want to be accessible to the public or viewable on your channel, you must first adjust the privacy settings.
The following is an explanation of what each privacy option entails:
- Public: Your video will be accessible to the general public. It will be included in the Videos area of your channel and may also be suggested to other viewers. The Public setting is the one that should be used for videos that you are distributing with the intention of educating your audience, creating engagement on social media, promoting your brand, or providing an inside peek at your company or community.
- Unlisted: Unlisted denotes that the video is not accessible to anyone who does not have the direct link to view it. If someone navigates to the video area of your channel on YouTube, the video won’t be accessible to the public. Videos that are not listed are not displayed in YouTube’s recommended views or in the search results on YouTube. When you choose the Unlisted privacy setting, you can share certain films with only those individuals who are likely to find the content relevant to their interests.
- Private: Videos that have the privacy setting set to Private can only be viewed by you and any other users that you specifically select to view the video. Videos that are set to private mode will not be seen by other users and will not appear on your channel.
- Scheduled: Scheduled posts the video to your channel but prevents it from being viewed by the general public until the day and time you specify during the video’s first upload. With this setting, you won’t have to submit each video in order to plan out a video campaign or series; instead, you may do it all at once.
After you have decided what level of privacy you want, click the large arrow button and navigate to the video you would like to upload inside your files. Alternatively, you can just drag & drop the movie into the upload box.
A word of advice: High-definition videos are ideal for your channel. You should upload a video with a resolution of 1920 by 1080 or 1280 by 720 pixels. People will think that you are a professional and that their attention should be paid to the substance of your film if it is crisp and clear.
Read also:
- How to Convert MKV Videos to iPad Easily?
- Disney+ Video Downloader for Windows Review
- Pazu Netflix Video Downloader Review
- How to Edit Your Videos?
- Top 6 Free Video Mergers
- VideoProc Review
- WonderFox HD Video Converter Factory Pro Review
Guest Author
This article written by Guest Author, Reviewsed.com doesn't take any responsibility of content that are written by Guest Author.