
Do you want to discover your weekly, month, or year listening history? Or do you want to get the Apple Music recap to see what songs you have been replaying? Receiptify is the perfect application for the job! You can get recaps from Spotify, Last f.m, and Apple Music in just a few seconds. Keep scrolling to discover more about Receiptify!
Receiptify is an instant and easy-to-share method of sending your listening history with the top tracks. But the features will work perfectly with the Apple Music subscription. The streaming service’s benefits allow users to view which songs they have heard the most. A quick way to do that is through the end-of-the-year recaps through Spotify Wrapped and Apple Music Replay. However, seeing some of these changes over a small period and sometimes often might only be beneficial. This is why there are various third-party websites.
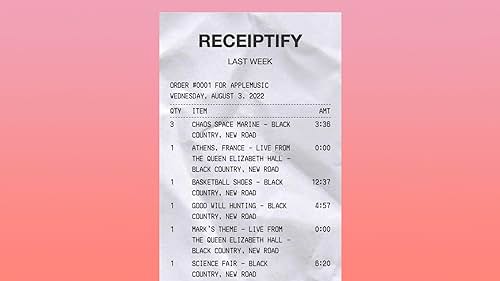
Receiptify allows you to create a receipt of the users’ listening habits, which can be shared and viewed whenever you want.
Receiptify Apple Music
You won’t find an Apple Music Wrapped; the closest it gets to is Apple Music Replay, but it won’t satisfy the needs of the people. Therefore, the top history generator, Receiptify, is popular amongst multiple Apple Music users. You can get a list of all the top 10 played songs using it. Apple Music receipts also come with additional information, such as your name, receipt creation data, and the collective listening time for the top 10 songs. However, unlike Spotify, Receitify for Apple Music only supports heavy rotation, which shows data for all times and not defined periods.
The Pros of Receiptify With Apple Music
- Showing Music Preferences: The preferences bridge the gap between social circles and the playlists on Apple Music. This is a unique way of showcasing your music preferences and providing users with the memories associated with playlists and different genres.
- Learn about your Listening Habits: Users can use Receiptify and see their top 10 played songs on Apple Music, allowing them to see their taste in music over different periods.
- Share your listening history: Users can now share their listening history in a receipt format on different social media applications, making it fun to tell friends about their music tastes and preferences.
- Keep track of all your stats: Receiptify is a scrapbook for music, allowing users to look back at their listening history, relive their favourite tracks and enjoy.
- Seamless compatibility: Receiptify is designed to work seamlessly with different platforms, making it accessible to a wide range of users, such as web users and iOS and Android users.
How to Create a Receiptify of Your Most-Heard Songs
To create a receipt of your music listening history, follow the steps we have listed below for smartphone users:
- Open the Receiptify website on your mobile phone.
- The homepage will allow you to log in using three options. Through Apple Music, Spotify, and Last. Fm.
- The login procedure allows Receiptify to access your musical records, but no data is stolen in the process, as per the privacy policy.
- Apple Music users have to tap the red button, which says log in with Apple Music and then complete it through their Apple ID. Some users will be asked to verify through their two-factor authentication as per their iCloud settings.
- Then tap on Allow on the page that requests your access.
- And voila, you’re done!
How to Download and Share Your Receiptify Receipts
Follow the steps below to download and share your Apple Music receipts:
- Tap on the download image button at the bottom of the receipt.
- You will then be asked to view or download the image. Select the download option to save the Apple Music Receiptify to your device.
- You can then share the receipt with your friends on social media platforms like Instagram, Facebook, and more.
The Connection Between Pop-Up Blocking and Receiptify
The most common problem you will run into with Receiptify is that it relies on pop-ups to log into your streaming music accounts. This means that for your account to work correctly, you’ll need to allow pop-ups to get your receipt. Here’s how you can enable Receiptify pop-ups on the Safari on your macOS:
- Go to the Receiptify website, click the Safari page in the menu bar, and then go to Settings for receipting.herokuapp.com.
- In the drop-down menu for Pop-up windows, tap on the Allow option.
- Now refresh the page and then select Login with Apple Music.
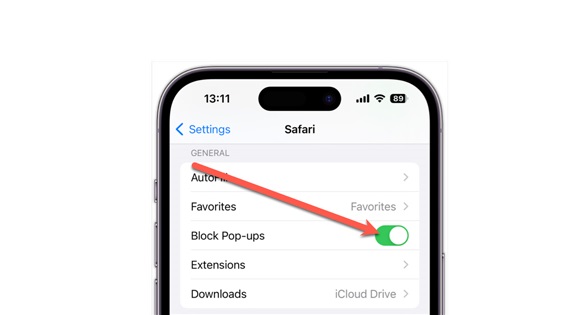
For iPhone users, unfortunately, you will have to allow pop-ups globally. The good news is that Safari on iOS still asks you to either allow or block the pop-up appearing.
- Open Settings and then scroll below to Safari.
- Click the toggle of the Block Pop-ups off so it turns grey instead of green.
- Now, return to Safari, refresh the page, and then click on Log in with Apple Music.
- As the alert pops up, click on Allow.
- Now choose Continue to finish signing in with your Apple ID.
Chrome users can allow the pop-up for the Receiptify page only; here’s how you can do it:
- When you click on the Login with Apple Music, chrome will instantly notify you that it is a blocked pop-up.
- A small icon will remain on the right corner of your search box. Click on it, then click on the option that says Always allow pop-ups and redirects.
- Tap Done!
- Now proceed to log into your Apple Music Account.
Steps to Take When Apple Music Receiptify Stops Working
If you have signed in to your Apple Music account in Receiptify before, but it’s not working now, you must check a few things. Firstly, make sure you haven’t blocked the pop-ups. The creators of Receiptify believe that an increase in traffic can be a cause of the errors. If this is something that is happening to you, then we recommend refreshing the website a few times. If it continues to fail, you will have to clear your cookies and the other data to work smoothly.
Here’s how you can clear your cookies and the data in your Safari:
- In the menu bar, click on Safari and then Privacy.
- Then, choose the Manage Website Data option.
- Search for Receiptify and then select the website.
- Now tap on the Remove button.
- Return to the page and try again, but remember you must sign in to your Apple Music Account again.
If this fails, we advise you to try Receiptify from a different device. There’s a possibility that there might be an outage or slow or heavy internet traffic, which may be the root cause of the problem.
Bottom Line
So many users face an issue with Receiptify and pop-ups getting blocked now and again. Now that you have figured out the reason behind it, we advise you to follow the mentioned steps to resolve the issue quickly and get a recap of your own. Receiptify allows you to get a recap of your music-listening history in just a few taps!
Read also:
- Can’t Play the Current Song on Spotify? Try These Methods!
- Pazu Spotify Music Converter Review
- SteelSeries Arctis Pro Headset Review
- How to Play Music from Phone to Car without Aux or Bluetooth?
- Jabra Elite Active 75t Review
Abdul Wahab
Abdul Wahab is a Software Engineer by profession and a Tech geek by nature. Having been associated with the tech industry for the last five years, he has covered a wide range of Tech topics and produced well-researched and engaging content. You will mostly find him reviewing tech products and writing blog posts. Binge-watching tech reviews and endlessly reading tech blogs are his favorite hobbies.