In this exciting digital world, learning how to map a network drive in Windows 10 opens up a series of storage possibilities for users. It doesn’t matter if you want to access files or collaborate in terms of work; our guide here will help you through and will assist you in taking control of your network drive.
Come along as we explore multiple settings on your Windows 10 and have a smooth experience accessing all your files. So it doesn’t matter if you’re a beginner or an expert in the field; opening up this guide will transform your computing experience. So get ready and dive into the world of mapping!
What is a Mapped Drive?
Essentially a mapped drive helps create a shortcut to a drive that isn’t on your computer or, in short, is located physically on another computer. The theory behind this is pretty similar to the shortcuts visible on your desktop, like often, at times, you may click on the documents folder to access your documents. Still, the only difference in the case of a mapped drive is that you are accessing files that aren’t available on your computer but can access the content quickly as if it is on your computer.
How to Map Network Drive
To learn the ways to map your network drive, you need to follow the steps we have stated below:
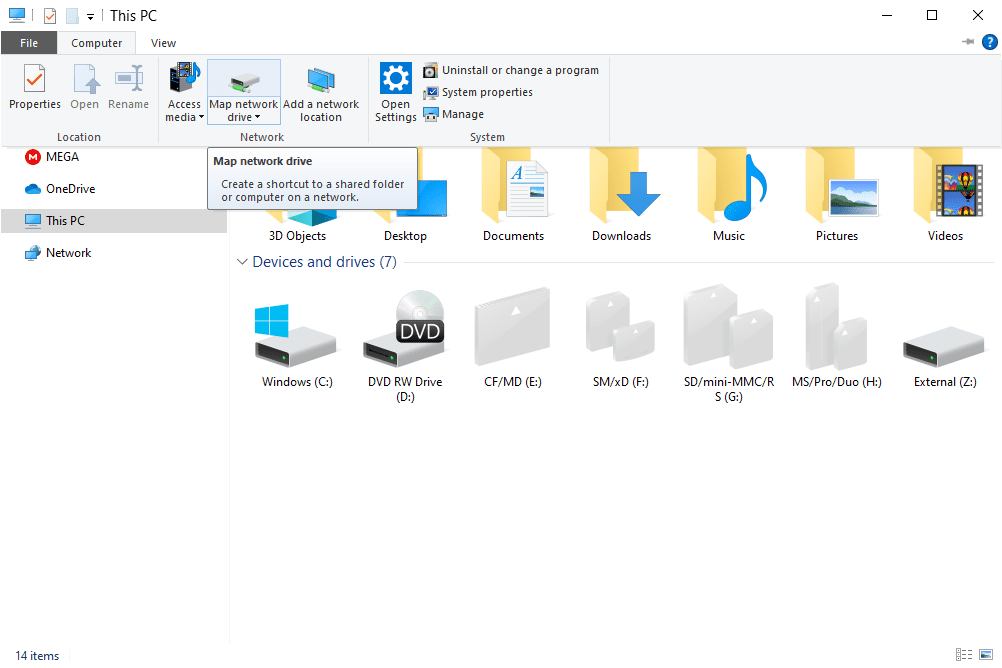
- Open the File Explorer on your device and then click on This PC.
- Now click on the Map network drive drop-down through the ribbon menu at the top, Then select the Map Network Drive option. All of this is available under the computer tab, which automatically opens up when you click This PC.
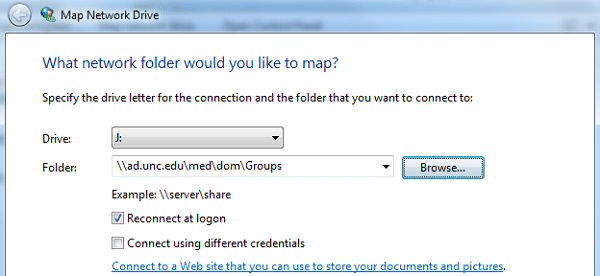
- Click on Browse after selecting the drive letter you require to use for the network folder.
- If in case you receive a notification stating an error, you will have to return to network discovery. For this, you will have to access the Control Panel, select the Network and Sharing Centre option, and then further choose the option for changing advanced sharing settings that will be visible in the corner on the top towards your left. Then switch on Network Discovery and save the changes that you have made.
- Select the option of “Network Folder.”
- Select the folder you would like to map and click on OK
- To confirm your selection, click on the option of “Finish.” This way, you can always reconnect to the folder whenever you log in, making it always available to you. If need be, you can also access the folder from a different account.
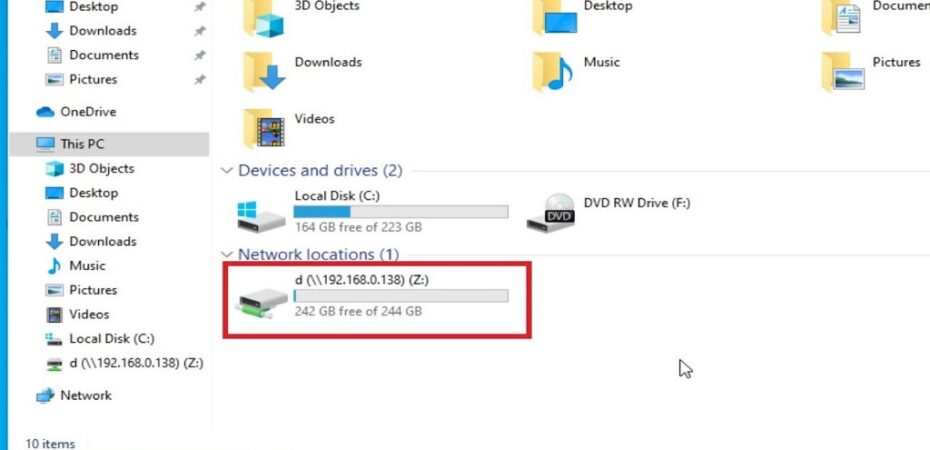
- Once you have completed this, you will be able to see the new drive letter under the option of “This PC” and thus will be able to access the folder and the data in it.
Benefits of Mapped Drives
There are many benefits of mapped drives, such as the fact that the question of insufficient memory being available often arises. In such cases, a mapped drive solves a significant chunk of your problem as you don’t need to download those files on, let’s say, your tablet in order to work on it; with a mapped drive, you can easily access the files that are already stored on another device and work on it without worrying about wasting memory.
Similarly, many online backup services offer the option of allowing you to backup the files through mapped drives, which means you don’t have to use the computer that the original files are in so as to back them up; instead, you can simply back up those files in their original location with the help of mapped drives, which will make life easier for you.
And lastly, sharing files back and forth between colleagues and even family can be a hassle. You can simply share the access with the required people through mapped drives and work on it alongside.
Drawbacks of Mapped Drives
The only drawback or limitation of mapped drives is the functional and working network requirement. If the network isn’t working that allows you to share the files between the devices, you will be unable to access the files, and resultantly you will be unable to work on them. This is why it is essential to have a functional network to gain the benefits of mapped drives.
FAQs
- How to find your Network IP Address?
Find your local network’s IP Address access settings by clicking the “start” option. Then select the option of network and internet, and from there, choose the option of WiFi. Once you are there, click on the WiFi you are connected to and select the option of “Properties.” Over there, you will find an IPv4 address written next to which your network IP address will be listed.
- How to Delete a Mapped Drive?
To delete a mapped drive, you need to follow these steps:
- Open File Explorer
- Click on “This PC,” which will be visible on the left panel
- Under the “Network Location” option, select the mapped drive you want to delta by clicking right on it.
- Select the option of “Disconnect.”
3. How to Manually Map a Network Drive?
To manually map a network drive, you will have to follow these steps:
- Go to the taskbar or access the Start menu and click open File Explorer (or you could press E and the Windows Key together)
- Choose This PC from the left pane on your folders.
- Now move on to the file explorer ribbon, allowing you to open the network drive.
- Now select More and then choose the Map Network Drive.
- From the list showing in the Drive, choose the option of Drive letter.
- From the folder option, click on the option of “Browse” to find the file. And to reconnect every time you sign back in, click on the option of “Reconnect sign in.”
- Click on “Finish”
Bottom Line
After reading this article, you should be aware of the process of mapping a drive on your Windows 10, and not only that, but you also have the basic idea of what mapping is along with its benefits and drawbacks.
We hope that the process of mapping a drive is easier for you, so happy mapping!
Read also:
- 7 Solutions To Fix SD Card Recognized On Windows
- How to Fix “Error Code: 0x0 0x0” on Windows?
- How to Fix “Windows Smartscreen Can’t Be Reached” Error
- What is TAP-Windows Adapter 9.21.2?
- How to Remove a Microsoft Account from Windows 10
- How to Install Android Apps on Windows 11
- How To Uninstall Internet Explorer Windows 10
Abdul Wahab
Abdul Wahab is a Software Engineer by profession and a Tech geek by nature. Having been associated with the tech industry for the last five years, he has covered a wide range of Tech topics and produced well-researched and engaging content. You will mostly find him reviewing tech products and writing blog posts. Binge-watching tech reviews and endlessly reading tech blogs are his favorite hobbies.