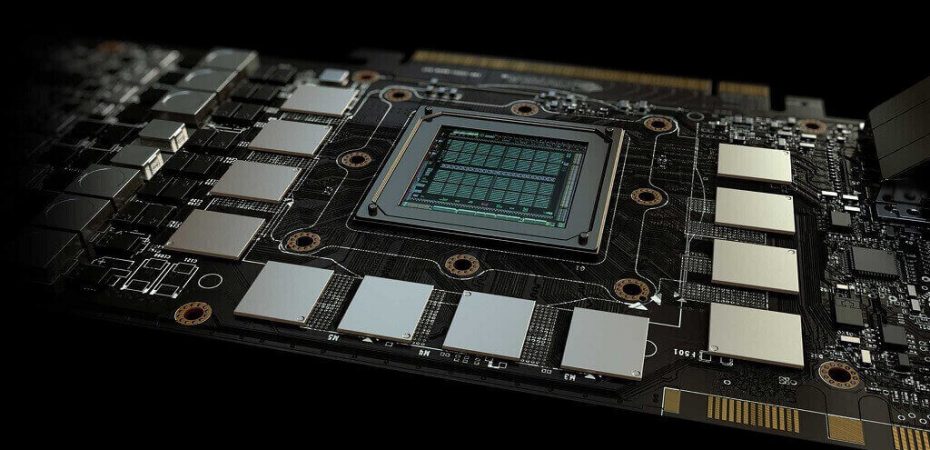
The individuals concerned with graphical activates more frequently are supposed to be closely familiar with the GPU or Graphical Processing Unit, and its associated primary constituents, i.e., VRAM; the graphical activities are not merely confined to the computer displays or some sort of video editing, but gaming applications also hold a significant consideration.
GPU is dedicatedly designed to accelerate the image creation processes; you will find such Graphical Processing Units embedded in almost every digital electronic device, by way of example, Personal computers, gaming consoles, mobile phones, etc.
Fundamental Insights With VRAM
VRAM stands for Video Ram or Video Random Access Memory; as the name implies, it is the specialized variation of standard RAM that is closely allied with GPU. If a GPU has more VRAM, that surely means that your computer can handle more complex graphical content.
Usually, in personal computers, both GPU and VRAM are located on the default Graphics card of the system; in few other cases, you can find it embedded on the motherboard of the computer system.
How much VRAM do I have?
This is a pretty common query raised by various computer users. Though this entire discussion aims to explain how to check VRAM available on a particular Windows 10 operating system, before that, it is relatively essential to highlight the situations that can trigger the users to check the available VRAM.
Suppose you have specific gaming or video editing prerequisites that may occupy an ample space of RAM or VRAM. In that case, it becomes imperative to check VRAM first so that if the available VRAM is not sufficient to carry out your tasks, you can timely take measures to increase your VRAM; VRAM can be increased by upgrading the GPU of the system.
How to check VRAM?
Definitely, it would be great to check the VRAM limit prior to initiating complex graphical tasks. In fact, to check the VRAM on Windows 10, which is the latest version of the Windows operating system, is no rocket science. The available VRAM can be checked in two ways; you can VRAM either via a built-in system application, or you can use any third-party application, too, for the same purpose.
Check VRAM via Display settings
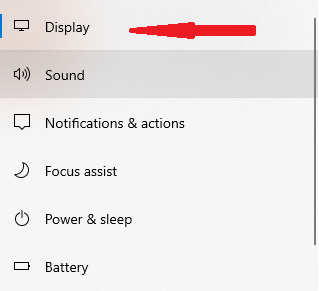
Using the built-in system utility to check VRAM should always be the first preference. Generally, the Display settings of the computer system serve as an efficient way to check VRAM.
- Press the key with the Windows logo from your keyboard to access the Windows menu.
- In the search bar, just type Display settings and opt for the first shown result.
- In the prompted window, click on the option “Advanced settings” located at the bottom right section.
- Now select the option “Display adapter properties.” (The display adapter basically refers to the Graphics card embedded in your system)
- Here you can see all the adapter information; specifically, the available VRAM can be checked next to the option “Dedicated Video Memory.”
- After checking the Adapter information, you can click on OK to close the respective Properties window.
Check VRAM via the DxDiag utility

When it comes to using third-party applications to check VRAM, dxdiag can be considered a helpful utility. DxDiag (DirectX Diagnostic Tool) is a computer tool that generally tests the DirectX functionality and gathers detailed information pertaining to variant devices and programs. To use this utility, you will have to:
- Launch the Run app by using the shortcut key Windows + R. (You can also access the Run utility by typing Run in the search tab)
- Type the command DxDiag in the prompted Run dialog box and click on the OK button.
- In the driven DxDiag Window, navigate to the Display tab in the top pane.
- Here, you can see the available VRAM next to the option Display memory (VRAM) located below the Device heading.
- Afterward, you can close the DxDiag Window by clicking on the OK.
Check VRAM via CPU-Z
CPU-Z is a free-to-use and third-party application fully compatible with Microsoft Windows and Android operating systems; it collects the information related to a few primary components of the computer system. So, this is also a good pick in order to check VRAM. For this:
- Download the compatible version of CPU-Z on your system and select the English language.
- Install the downloaded file of CPU-Z on your operating system and run it afterward.
- The CPU-Z utility will take few moments to detect the system’s graphic card. Then you need to navigate to the “Graphics” tab, and you can see all the information it has gathered regarding the Graphical Processing Unit encompassing the available VRAM too.
Conclusion
How much VRAM do I have? This is the most frequently asked question pertaining to VRAM so far because VRAM plays a vital role in accommodating complex graphics on a computer system. The users hunting for ways to check VRAM can find this brief discussion quite helpful.
Using the system’s own built-in utility to check VRAM is relatively more straightforward as you just have to access Display settings, while you can also use third-party applications such as CPU-Z or DxDiag to fulfill the exact requirements; the choice is all yours.
Read Also
- 14 Ways to Speed Up Your Laptop
- How To Fix Dragon Age Inquisition won’t Launch in Windows 10?
- RTX 2080 Super vs RTX 2080 Ti
- Intel Core i7-9700K vs Core i7-8700K
- What is Anti-Aliasing and Why Is it Important for Gaming?
- How to Use an Iomega External Hard Drive
Zubair Hussain Khan
Zubair is a tech geek who loves technology and writing about it. He also loves to travel and spread knowledge about online security.